


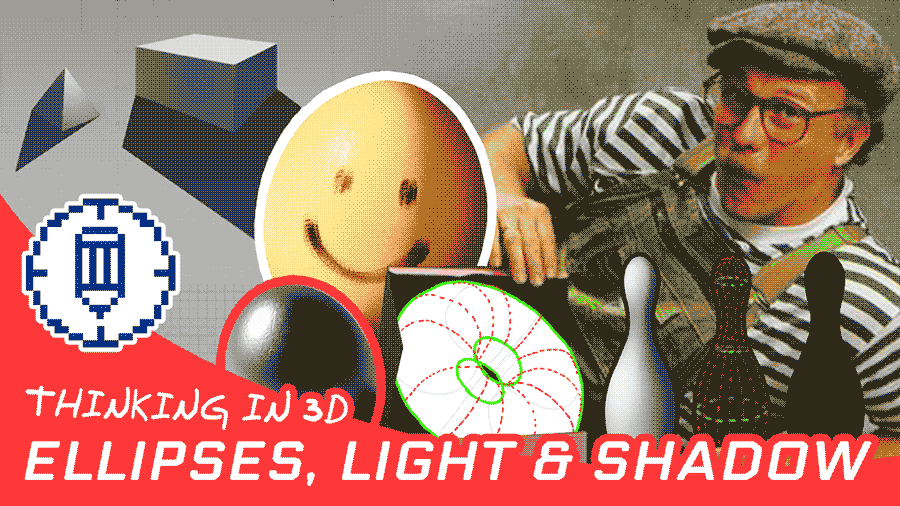
A tutorial that covers the power of ellipses and the properties of light to help push your drawing and painting skills.
You should have a good understanding of basic geometric shapes that can be drawn in perspective, within a 3D environment.
Please check out the previous episode to get up to speed on drawing in perspective. These videos are designed for sequential learning, so now we’re going to take those 3D objects and give them context by lighting them up!
Understanding Ellipses
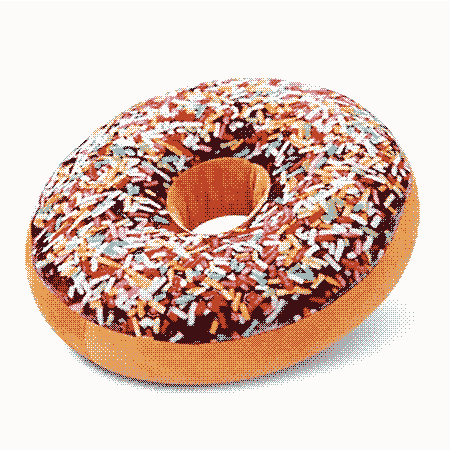
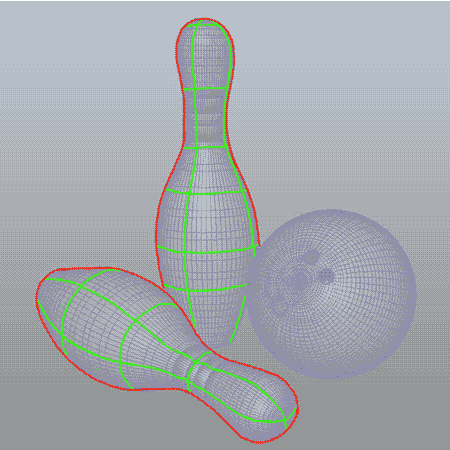
An ellipse is a curved line that is connected to other points, it helps to determine the form and overall volume of the subject. Ellipses must be correct or the objects won’t be described properly, they’ll look distorted and wrong.
Again, these are important because they contribute towards making your art believable. Which is key to creating compelling art.
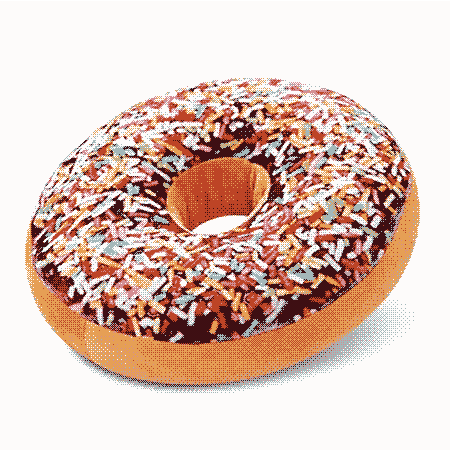
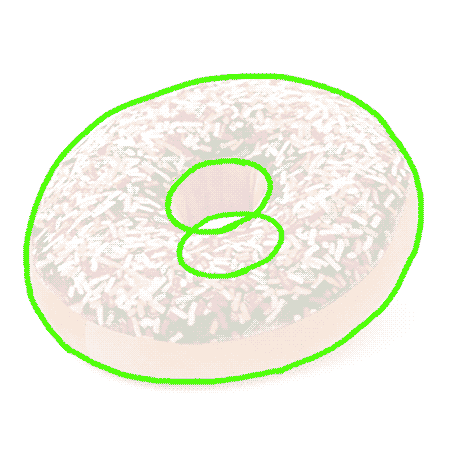

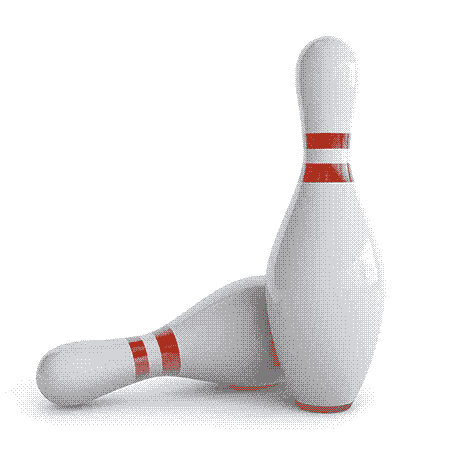
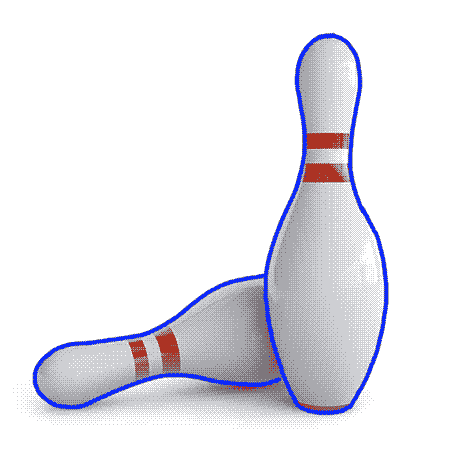

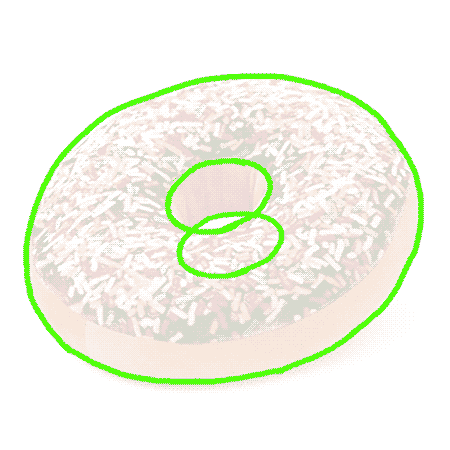
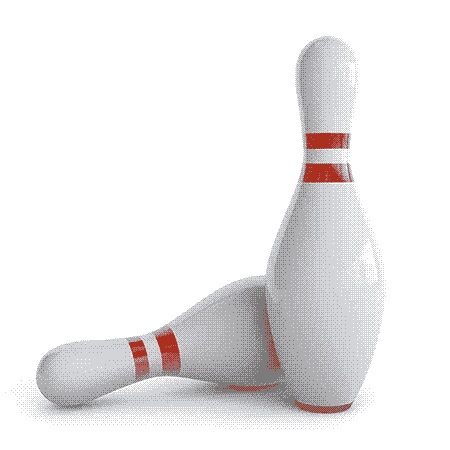
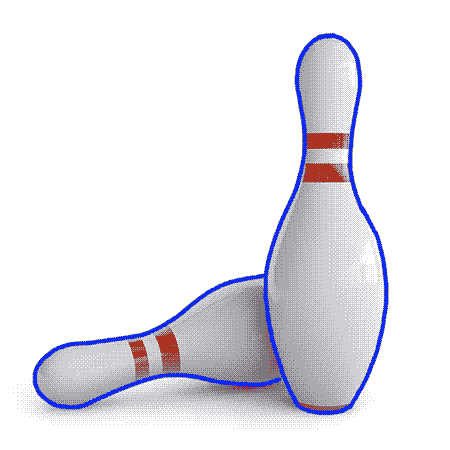
So we’re basically finding images of objects that have curves in them. I’m using the Ellipses Generator to prompt me with some ideas… then we take the images and simply find the curvature lines.
There’s a .psd with a grid and coordinates to place the shapes and lights available to download, it works in conjunction with the generator and it helps you to learn through practice how to project shadows and shade objects based on specific lighting setups. It’s a good practice to make you aware of the 3D nature of a subject. Having this in mind when sketching or painting will help you render the light & shadows correctly.
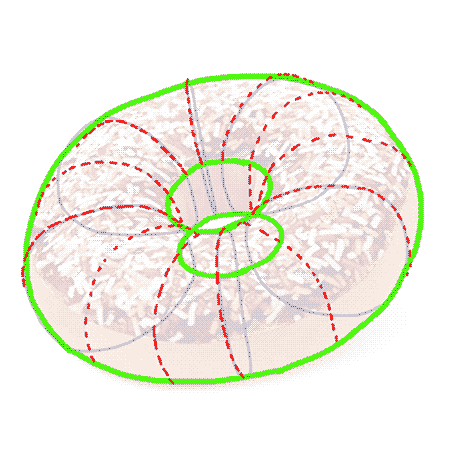
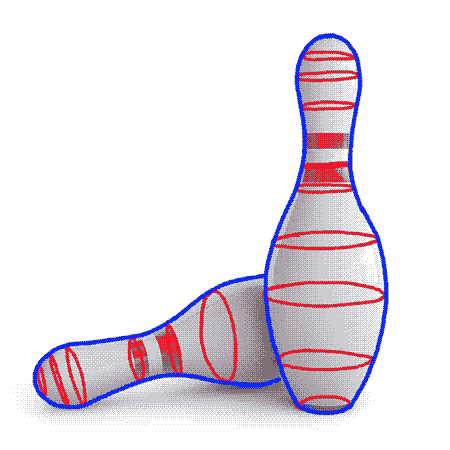
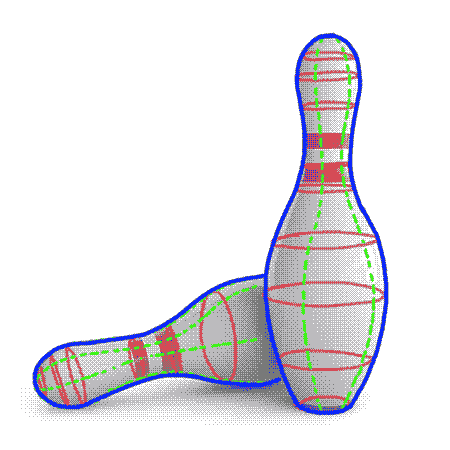
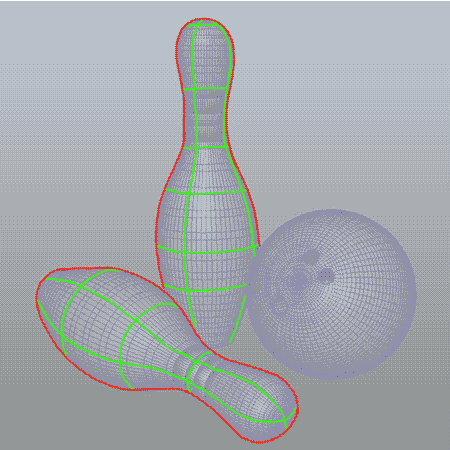
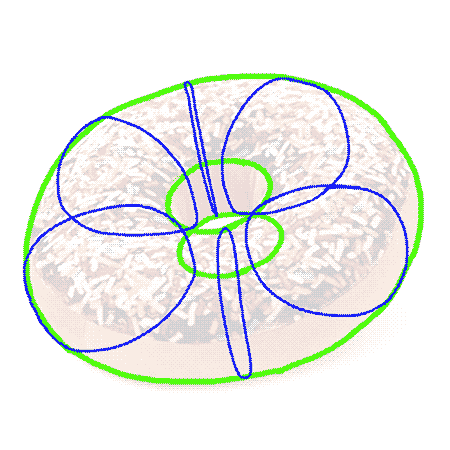
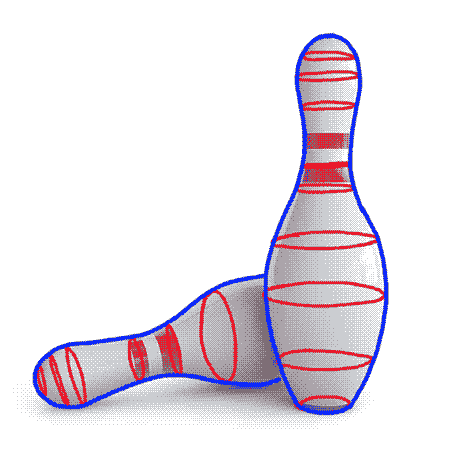
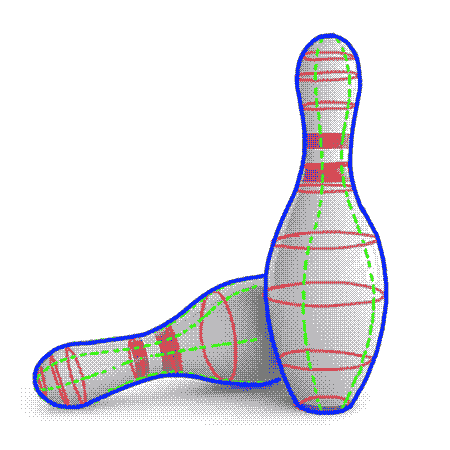
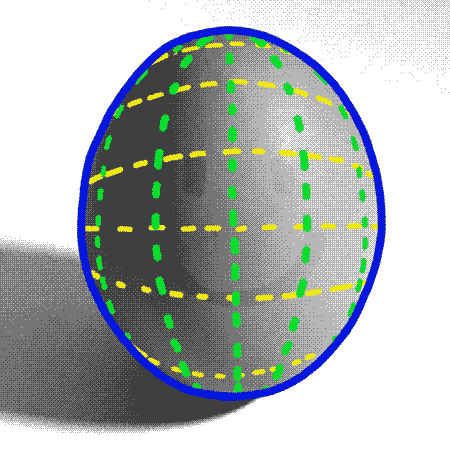
When practicing.. try and consider where curve bends as the form recedes. The ellipsis lines will become more frequent as the curve falls further into the distant, like on the cylinder below for example.
You can see how these ellipse guideless have already helped to start define the overall form and volume of the shapes within a 3D environment. This principle should be kept in mind when approaching any 3D object. Basically everything you see around you!
Light, Shadow & Projecting Shadows
By understanding light and shadow, we can begin to predict how it behaves. When we can predict how it behaves, we can come to a place where we draw objects with more accuracy.
What is shadow?
A a shadow is essentially dark area or shape produced by a body coming between rays of light and a surface. Shadows are rooted in ‘darkness’ which is essentially the absence of light.
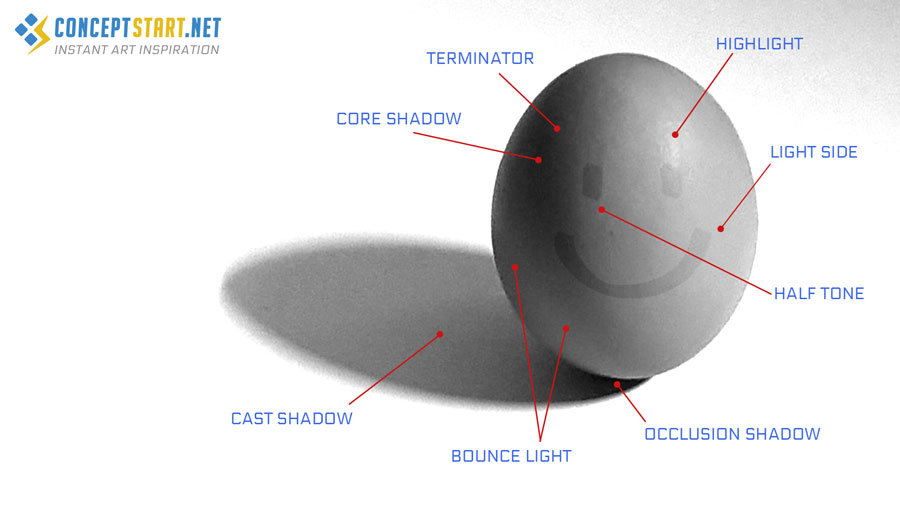
Cast shadows - A cast shadow is general what we think of as a shadow. It’s created by something blocking the light source. It could the shadow of a vase from an indoor light source, or the shadow of your nose cast across your face from the sun. Shadows fade the further they are away from the object creating it. Shadows aren’t black either, they can include light from other sources. E.g the sky
Form shadow - A form shadow has a softer or less defined edge to it than a cast shadow. It is lighter than a cast shadow because it’s created by light not reaching around the object rather than a shadow being thrown by the object where it directly blocks the light source.
Occlusion shadows - Are basically dark areas, the nooks and crannies of a subject where light cannot reach.
What is light?
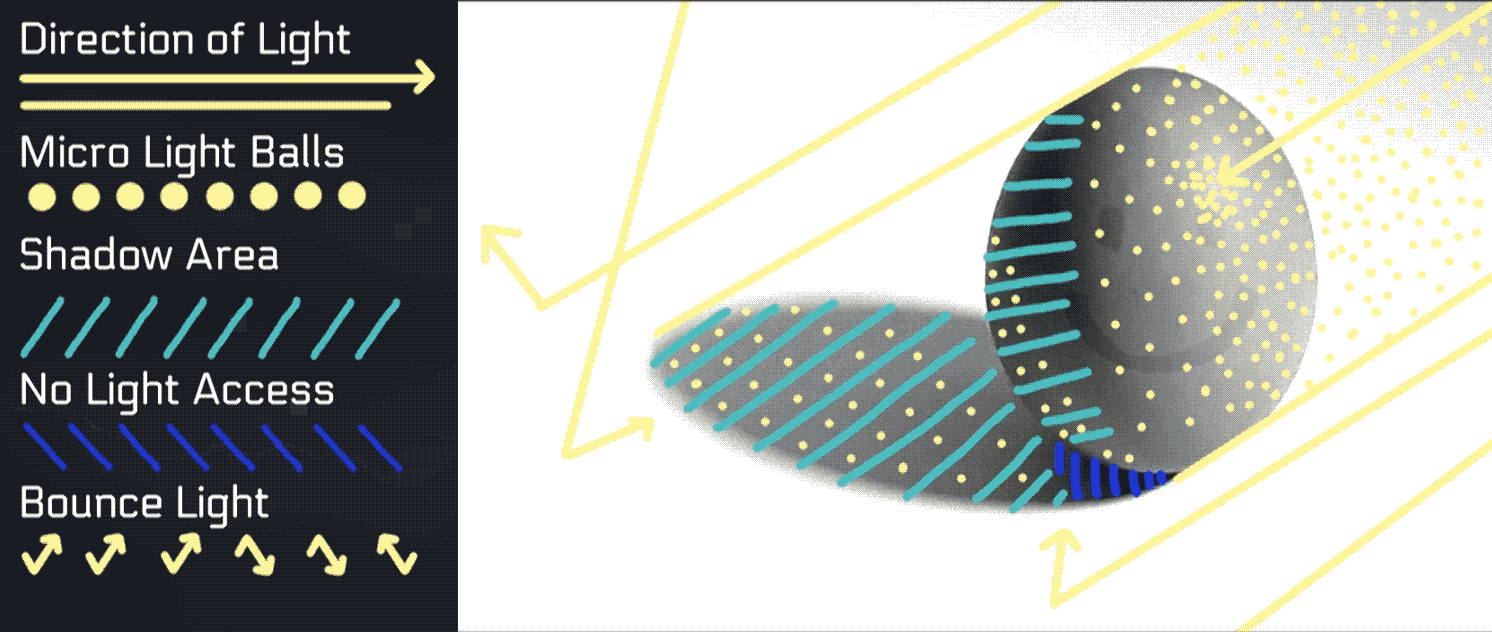
Light is essentially electromagnetic radiation that illuminates things and bring things out of darkness. Think of light as micro particles or balls that are projected from a light source and bounce around to fill a dark space.
Light can effect surfaces in many ways, there are specific terms given to light that are useful to understand when drawing or painting:
- Light Fall off - The speed at which light goes from light to dark.
- Terminus - The cut off point at which light falls off an object and can no longer hit it.
- Key light - The strongest light source in the scene, plays the biggest role. Sets the emotional tone of scene, telling the viewer how to react to what they’re seeing.
- Fill Light - Not as bright and adds colour interest, the supporting actor so to say. It’s supplementary light used mainly to lighten shadows.
- Rim Light - Comes in around the edges, defines object. Use different combinations of these to create different feelings, moods and stories
- Ambient light - Any type of light present in a scene. Also known as Available / Existing Light
-
Bounce light - Light that bounces off an object and falls onto a subject to create a new light source. Every time light bounces it loses strength.
The distance of a light source in relation to the subject will cause the light to react with the surface differently, and also create different types of shadow.
Nearby light sources
- Shadows grow in size the closer to the light
- The Terminus becomes higher, closer to the light
- Light rays don’t hit at same angle so more varied tone spread across object(s)
- These lights play a more active role in scene as a the focus point and can add tension
Far away light sources
- The larger the light source the more the terminus moves away from the light source
- It becomes softer and feel warmer because the light rays hits from a more diverse range of angles and doesn’t reach every part of the shadow area equally
Projecting Shadows
Portraying accurate shadows will help to seal a drawing or painting as it gives the impression of correct and consistent lighting.
In order to portray the shadows correctly, we need to understand where the shadow falls in relation to the light source! So there’s some basic steps we can take to work them out. There’s 2 main things we need to consider when working out shadows, these are:
- The Direction of Light - The direction of the lightsource determines the direction of the shadow.
- Angle of Light - The angle of light determines the end shape of the shadow
Shadows coming forwards


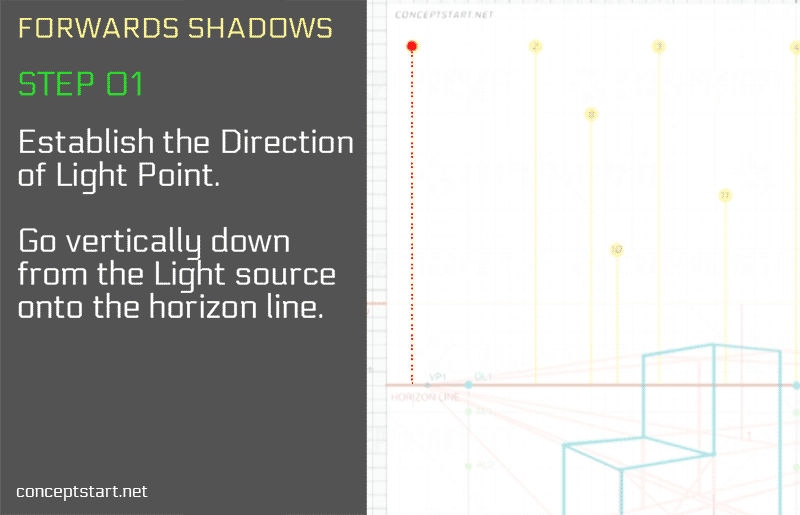
If a shadow is coming forwards, it means that the main key light source is somewhere in the background, and usually visible although it will often be off screen and unseen. We first consider the Light Source to find the The Light Point, which is a point placed on the horizon line that shoots vertically down from light source.
- Step 1: Establish the Direction of Light Point. To find this, go vertically down from the Light Source seen in the background (it might be offscreen), and place a dot where it meets the horizon line.
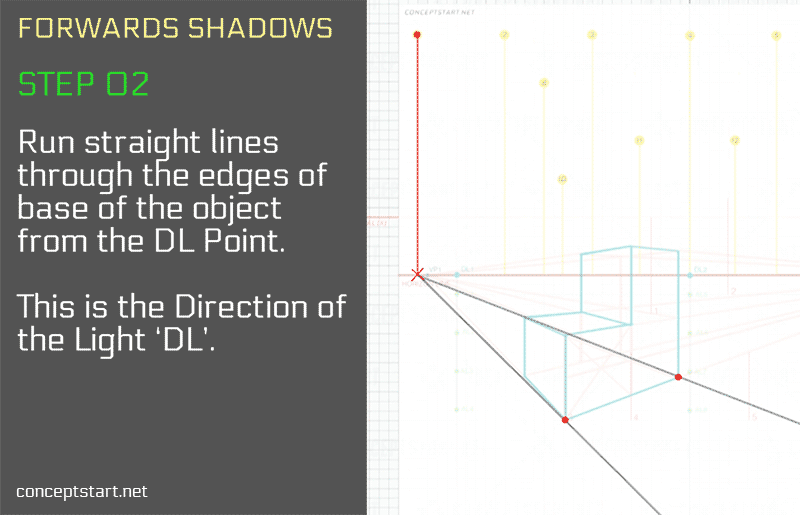
- Step 2: From this Light Point on the horizon, run straight lines through the edges of the base of the subject / object. These are the ‘Direction of Light’ lines. Focus on the outer corners or edges, and any corners or sections where there are form changes. These lines will create the boundary for your shadow.
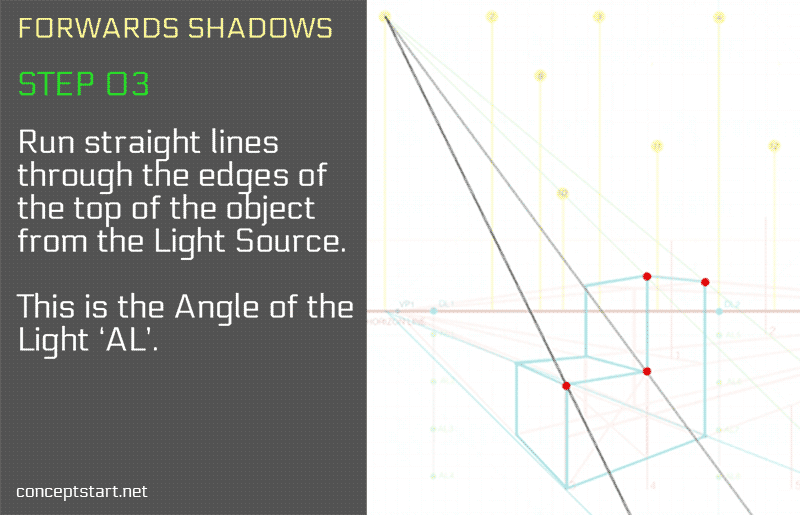
- Step 3: Similar to above, but run straight lines through the edges of the top of the subject / object directly from the Light Source itself. These are known as the ‘Angle of Light’ lines. These lines will determine the final shape of your shadow.
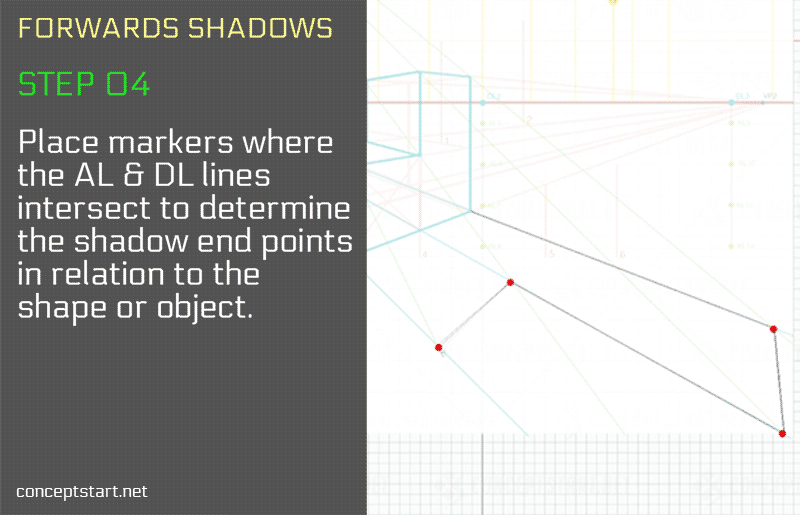
- Step 4: You will now have 2 sets of lines. Where these lines overlap and converge determines the points for you to place your shadow. You can begin to connect the points and create your shadow outline, fill it in accordingly.
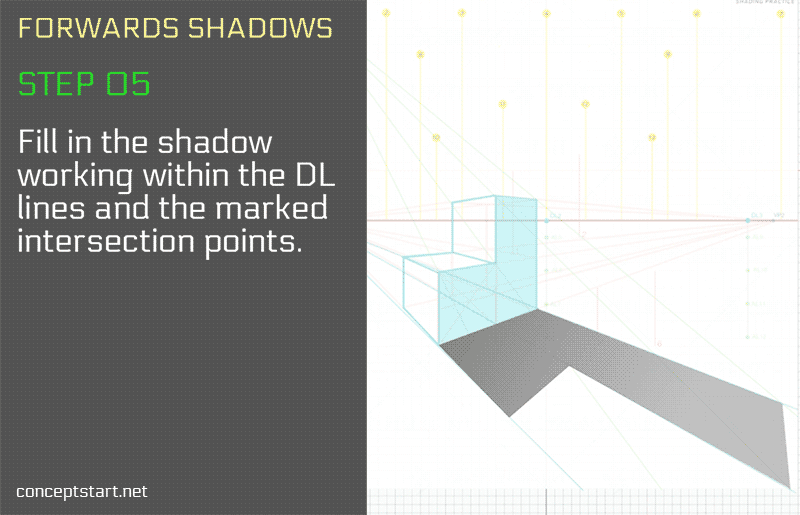
- Step 5: You can refine the shadow, softer the edges furthest away from the subject, make it slightly lighter all depending on the light source in relation to the object
Remember that shadows are more crisp the further away the light source is, and softer the closer the light source is.
Shadows going backwards
So this process is similar to shadows coming forwards, but we need to work out the angle of light in reverse this time. Like determining where the gun is by working the trajectory of the bullet.
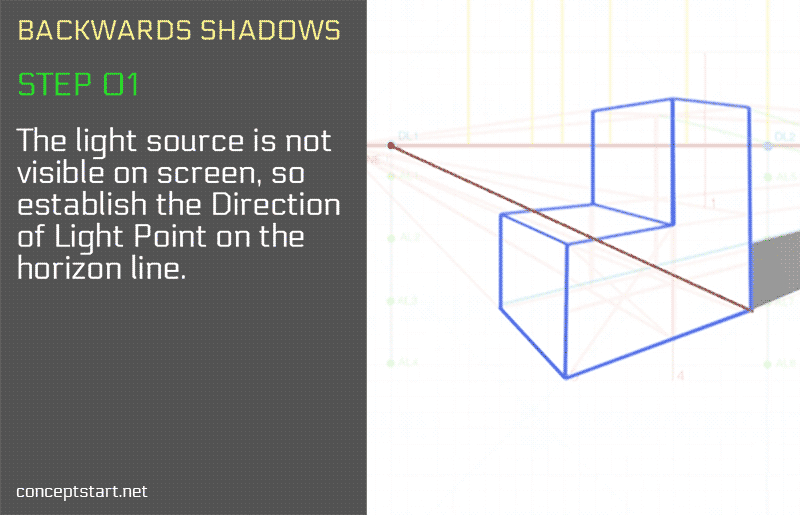
- Step 1: The same as for shadows going forwards, establish the Direction of Light Point which is go vertically down from the Light Source on the horizon line.
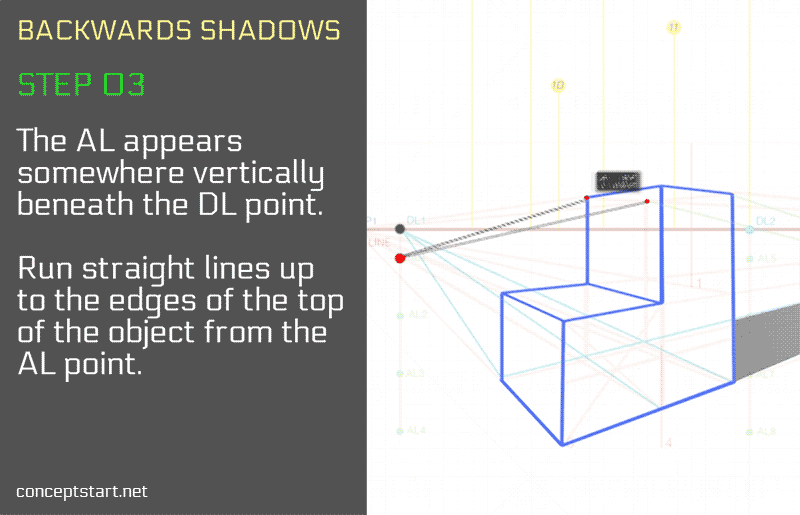
- Step 2: Again, from the Light Point on the horizon, run straight lines up to the edges of the base corners / edges of the subject / object.
- Step 3: This is where the main change comes, we need to determine the Angle of Light as it’s not visible. In this case, we must always go directly below the same vertical axis as the Light Point on the horizon, and determine a point. Where to place it exactly is simply where you intend you imagine your light source to be. The Is the light source really high? Then the angle of light point will be further away from the Light Point on the horizon. It works like equal and opposite; the higher up the light source is the more acute the angle of light will be, so the lower it will be on the axis beneath the Light Point The angle of light must never go below the base of the subject through, or the shadow just wont work. It must always be at least a little higher.
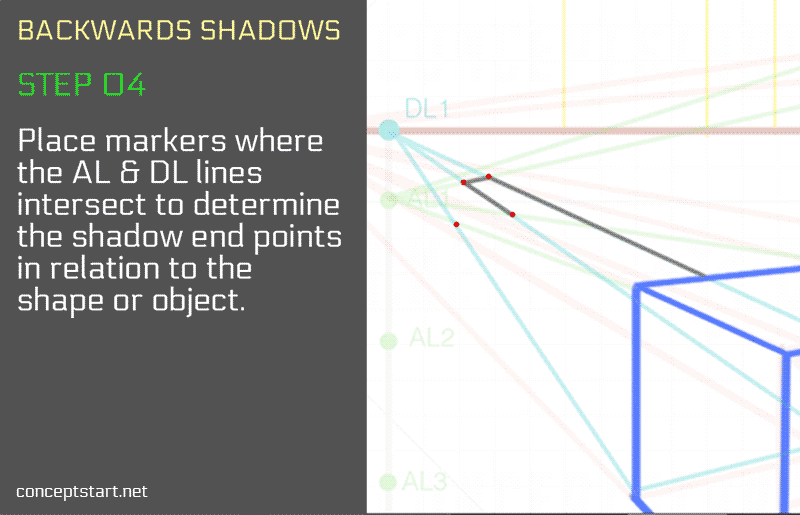
- Step 4: You’ll have 2 more sets of lines, where they overlap and converge determines the points for you to place your shadow. You can begin to connect the points and create your shadow outline, fill it in accordingly.
- Step 5: Begin to refine the shadow base on your understanding of the type of shadow you can expect from the light sou
Light & Types of Surface
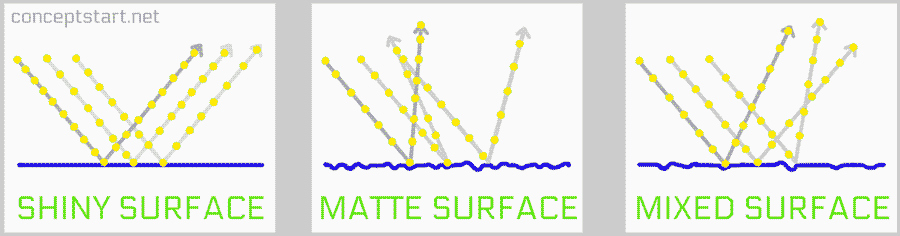
Light reacts differently depending on the surface. We’ll focus on just 2 types in this tutorial; Shiny surfaces and Matte surfaces. The most reflective surface would be a mirror, where light us not absorbed at all, but instead deflects off to leave a mirrored reflection of the things around it.
- Specular reflection - This is where the light clusters in a condensed spot, as thought it’s reflecting the light source directly like a mirror, but its not 100% reflective so it spreads a little in this one spot.
- Diffuse reflection - this is where the light spreads out across the object or shape more. This surface is far from a reflective surface, it absorbs the light which spreads across it more evenly.
- Isotropic reflection - This is where instead of clustering from a single point, the light is reflected across the object. Like a pole, the light shoots across it. It’s a horizontal type of reflection and occurs in cylindrical forms.


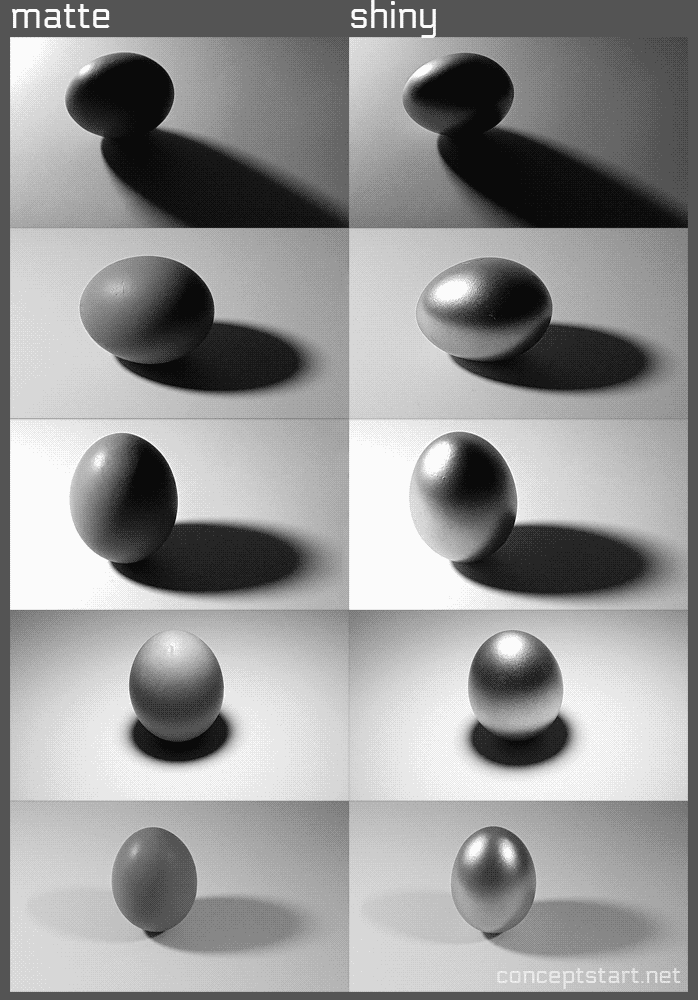
I conducted a test where I used 2 same sized eggs, but one is traditional matte and the other spray coated silver for a more reflective surface. I kept the lighting setup and position the same, so when laid over each other you can see the differences that occur in the light and the shadows.
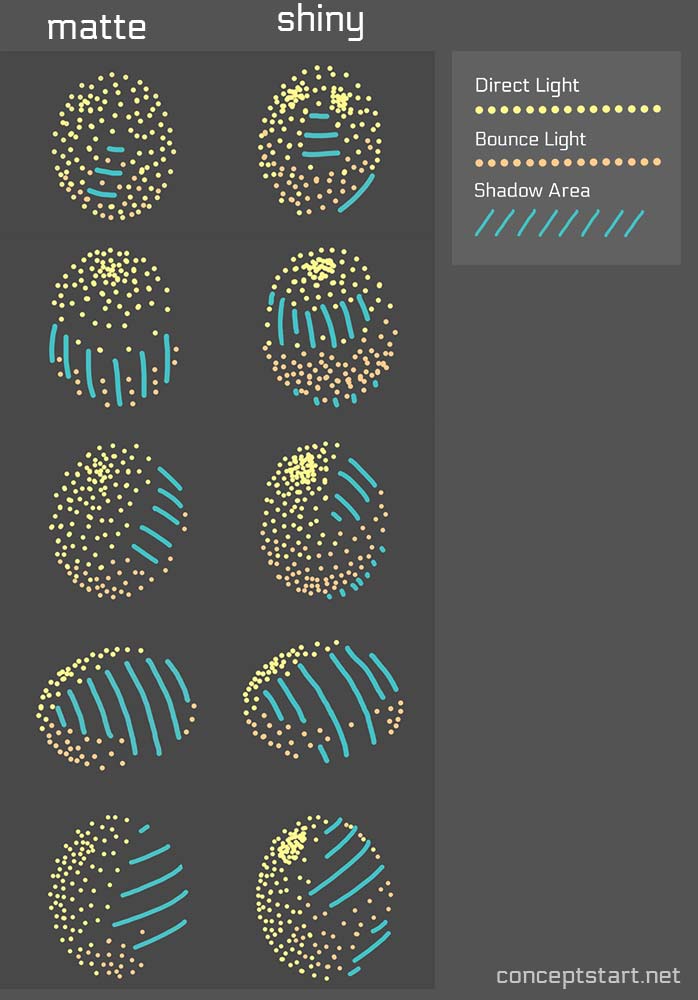
Take a look at the images below which showcase the eggs under different light setups, and patterns of dots and lines applied over the lights and shadows.
Based on the results, it seems that on the matte surface the light scatters and spreads out more evenly whereas on the shiny surface, the lights and darks group together more.
This is a simple test that might give obvious results, but we need to consider when drawing or painting that the way in which light is presented to us is not just dependent on the properties of light itself. There are properties of surface to consider too!
The appearance of light changes depending on the type of surface the light it hits, and therefor changes how you need to shade, draw or paint it.
Next Steps to Improvement...
Practice Drawing & Shading Tasks!
The principles outlined in this tutorial are just a brief overview, a point in the right direction. In order to improve your shading skills, knowledge of light and shadow, and thinking in 3D you need to practice shading starting from basic objects and work your way up towards more complex shapes and lighting setups.
You can use the Shading Task Generator which is designed to provide active learning through structured drawing tasks outlined in this drawing tutorial. There are various levels to practice too, starting from the basics and working all the way up to more complex types of shading, shadows and types of ellipses
| DRAWING TASKS |
![]() Video Tutorials
Video Tutorials ![]() Task Generators
Task Generators
| GET CRASH COURSE |
